Cross D Ranch
Basic Horsemanship & Riding Exercises
We are students and advocates of the classical riding approach. Although this riding philosophy is typically equated with dressage (most commonly the Spanish Riding School), we believe the principles are more universal and can be applied to any area of quality riding and horsemanship.
Classical riding encourages a "balanced, deep and feeling seat" in order to improve communication with your horse. "The horse is ridden with the seat first, then the legs and into the hands." The rider rides from his center and is expected to have great discipline and self-carriage in order to improve the self-carriage and balance of his horse. (Quotations from the Classical Dressage Notebook.)
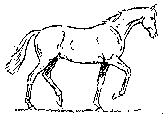
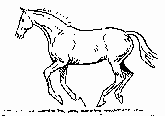
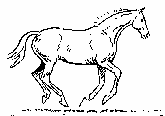
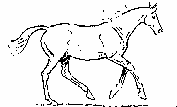
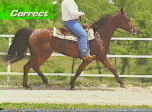
Understanding how your horse moves through the different gaits will greatly improve your riding experience. Click on the pictures below to see a short clip of each gait
In the order that they appear above each gait is listed as follows:
1. WALK - a four beat lateral gait. Footfall sequence is left hind, left front, right hind, right front.
2. TROT - a two beat diagonal gait. Footfall sequence is left hind with right front, right hind with left front. When posting on the inside (correct) diagonal a rider will rise as the inside front shoulder moves forward.
3. CANTER - a three beat gait. A horse can be on the right lead or left lead - the correct lead for going in a circle to the right is the right lead, a left lead for a left circle. The lead can be identified by watching for which front leg appears to be "leading", or striking first. Footfall sequence is outside hind, inside hind with outside front, inside front.
4. GALLOP - a four beat gait with a moment of suspension between strides.
5. PACE - a lateral two beat gait. The legs on each side move together. The head moves side to side.
6. FOX TROT - a smooth trot where the front legs seem to take long reaching steps and the hind legs seem to take quick, high steps. The hock on the hind foot bends sharply and hesitates in the air before following the diagonal front to the ground. The head nods up and down in motion with the shoulders.
RIDING BASICS
Sally Swift, in her book Centered Riding, describes the four fundamentals of riding as the following:
Eyes
Breathing
Center of Gravity
Building Blocks
Using the Aids
- The circle of aids is the horse's legs, the rider's legs and body, and the horse's bit. All of these things connect.
- Podhajsky organizes the aids into three categories:
Pushing aids (legs, weight, clucking, spurs, whips)
Stopping aids (reins, back & weight)
Preventing aids (legs, unilateral action of reins)
- The outside rein is for guiding, slowing, and making the horse go straight. In other words it is for controlling the amount of bend, impulsion and balance. The inside rein is only for bending and softening. The inside leg is at the girth giving the horse something to bend around (even when you are going on a straight line you can think of having a slight bend to one direction or the other). The outside leg is behind the girth but sitting quietly and passively.
- When you ride circles or corners feel like you are riding from your inside leg to your outside rein.
- Don't grab or hold the horse with your legs (or any of your aids) or the horse will lean on you and become unresponsive. Always bump, bump (or pull and release, depending on the aid).
- Always think tall. Tall legs, tall body, head stretched up to the ceiling.Look up at the ceiling when slouching and this will force your body to be tall.
- The more the horse leans forward and gets heavy the more you need to sit tall and back. Feel like you are sitting back on his haunches. Don't let him pull you forward.
- If your feet are falling out of the stirrups this is an indication that your heels are not low enough. If one leg always falls out of the stirrup during transitions, circles, etc. this is an indication that you are not sitting squarely.
- Keep your hands on each side of your belly button, do not cross over. Pull your hands back towards your hips. The knuckles should be close enough together that they could touch easily.
- If you have trouble tightening up one leg and blocking the horse with it drop your stirrup to force you to relax. (Drop both stirrups if necessary.)
- To use spurs turn your toe slightly out. Keep the spurs on the horse's belly until you get the correct response. Start soft and build pressure. You can even turn your knee out a little if necessary for the strongest pressure.
- When having trouble with something during riding never do the same thing more than twice in a row as this will help the horse develop a bad habit. Come up with a new approach and try things from a different angle.
Riding the Walk
- Know where your horse's feet are at all times. The walk is a four beat diagonal gait with the diagonal legs moving together. Feel for the horse's belly swinging back and forth. When you want to move the horse over catch him when his hind leg is in the air so that he can open it out.
Riding the Trot
- The trot is a two beat diagonal gait. Learn to know which diagonal your horse is on by feeling for the inside shoulder coming back.
- At the trot imagine your horse's legs are bouncing off the ground like a rubber ball. Think "bounce, bounce" with each step and use your legs and seat to help support the energy.
Riding the Canter
- The outside leg moved passively behind the girth signals the canter. The inside leg pushes into the girth and makes the horse strike off. Make sure the inside leg does not come too far forward or it will lose its value.
- The inside rein puts the horse in the right position and (with the outside rein) keeps the hindquarters in. If the horse is heavy on the inside do half halts with the inside rein.
- When transitioning from the trot to the canter don't allow the horse to increase into a faster trot and then fall hastily into a canter.
- When cantering the inside leg connects to the outside rein and vice versa.
- If the horse's shoulder is falling downhill when going around in a circle use an indirect rein on the inside to lift his shoulder up and support this by keeping your outside leg far back and bumping him so that he keeps his hip underneath.
- If you lean forward while cantering (or at any gait, but it is the most noticeable at the canter) this can cause you to drop your inside hand, raise your outside hand and allow the horse to drop his inside shoulder. If this is a problem imagine that you have velcro on your hips that your arms are stuck to. Remember to be tall.
- Inside rein should pull up towards your belly button and to horse's outside hip. Don't allow it to cross over the horse's neck. The outside rein pulls towards your hip.
- If the horse is heavy at the canter try counter bending him down the long sides of the arena. To cue for this bump the horse lightly with the inside leg, connecting to the outside rein. Just make sure that the signal is not over done and signaling the horse to completely change leads.
Counter cantering to lighten up the horse:
- Start with the lead that is easiest for the horse and then, once the principle is understood move on to the stiffer lead.
- Canter once around the arena then do a rein change through the short diagonal (as seen in Arena Figures). Keep the horse on the same lead by letting the wall turn him and keeping your original outside leg (becoming your new inside leg with the direction change) back to keep the original bend. Counter canter around the arena once or twice and then change directions back through the long diagonal.
- Can also pick up a counter canter by going into a shallow arc (as seen in Arena Figures). Pick up the lead through the first bend and keep it as the horse comes back to the wall.


